Westmoon Kingdom
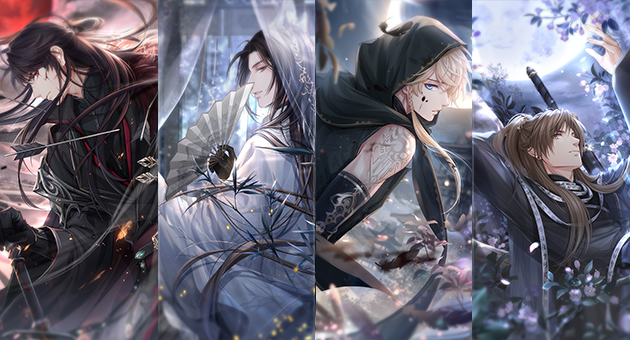
Westmoon Kingdom is an Alternate Universe/AU Event which unlocks after completing Chapter 6 in the Main Story, and is accessed through the "Westmoon Kingdom Icon" placed on right top of any chapter map. Westmoon Kingdom (Event) ran from 5th July to 5th October 2021 (in total 93 days).
After the event ended, you can no longer gain the Time-Limited West Moon Karmas. Daily Duty and Patient Practice tasks are removed and you can't collect any Ray of Hopes. Furthermore you can't convert Stamina into Feather Stamina (neither buy them with gems). You can still gain Feather Stamina through natural regeneration. Westmoon Wish Tree is also unavailable after the event. But you can still continue to strengthen your Karmas for battle stages.
Lore
Occulter
In the Westmoon Kingdom, Occulters are people born with a special power: Occult. Occulters have different abilities that can be used in different fields, and they have lived in peace with normal people for many years. Together, these group of people build the flourishing age of Westmoon.
Occullith
A special stone in the Westmoon Kingdom which has many colors and cannot be destroyed easily. People say that there is Occult in Occullith and that it can be used to strengthen an Occulter's power. Many people have tried to extract the Occult in it, but no one has succeeded so far. Occullith is an incredibly precious resource, and it is managed solely by the Royal Occultist's Guild.
Demon and Bedeviled
Allegedly, an Occulter will become bedeviled if their intention is not right. The Occulter will experience a sudden change of power and become a Demon. At the beginning of becoming bedeviled, the Occulter will lose their mind and attack everyone. The true reason for bedevilment is still unknown, and it seems that there are other secrets behind it. Hundred of years ago, deported Demons set up the Demon Realm within Retrobyss. To defeat the Demon, Royal Occultist and the Royal Occultist's Guild emerged.
Royal Occultist and Royal Occultist's Guild
A Royal Occultist is an Occulter whose duty is to defeat Demons. In the early years, three Royal Occultist Houses set up the Royal Occultist's Guild in order to fight the Demon Realm which had grown stronger. Nowadays, the Royal Occultist's Guild is one of the most important authorities in Westmoon. Only the Occulters who have received a certification from the Royal Occultist's Guild can become a Royal Occultist, and therefore have access to tools that can be used to defeat Demons.
Occulgift Ceremony
According to a prophecy from the Oracle, the Sorceress will hold the Occulgift ceremony on a spring day every year to prevent Occulters from becoming bedeviled. The dance of blessing from the Sorceress can purify the power within an Occulter, and it can arouse their occult by enlightening them.
Sorceress
The chosen girl that is responsible for holding the Occulgift ceremony. The identity of the Sorceress is noble and mysterious, and her face is hardly seen by others while she is dancing on the Occulsoul Pillar.
Terminology
Similar to the City News and Weather Feature, Westmoon shows on the top bar of your phone, further explaining the lore from the AU.
Occullith - Occullith can enhance an Occulter's powers, but it has no effect whatsoever on normal people. Many people are researching methods of extracting Occult power from Occulliths.
Royal Occultist - Royal Occultists have a strict hierarchy, and it is said that today there is only one who has attained the title of "Peerless".
Noble Houses - Among Royal Occultists there are three Noble Occultist Houses. The Royal Occultist's Guild is administered by the Royal Court, but most of the decision-making power rests with the heads of the Noble Houses.
Bedevilment - No one knows how the first demon appeared, but according to divine revelation, Occulters will turn demon when their hearts become twisted.
Shades - Every leader of Shadow Tower takes the name "Shadow", and their former name is forgotten by all.
Meteorite - Legend has it that the country of Westmoon was established on a continent shaped by a fallen meteorite. The meteorite is hidden in the depths of the Retrobyss, and so the nation does not make sacrifices to the heavens, but to the underground.
Strangelings - Although folklore is full of tales of the supernatural, stories and details of the race of "Strangelings" have only just started circulating in recent years.
Strange Bell - In recent years, after night descends upon the taverns of Three Dreams Quarter, cakes and sweet wines often go missing, and night watchmen report hearing the sound of little bells.
Heaven Avenue - Ninth Heaven Avenue is a central axis of the whole city. It runs north to south, dividing the city into two equal halves.
Demon King - Someone has bragged in Three Dreams about seeing the Demon King, but the words of a drunk can't be trusted.
Westmoon Stages
Westmoon stages require ![]() Feather Stamina instead of
Feather Stamina instead of ![]() Stamina to play. You're able to convert your Stamina into Feather Stamina by clicking on the "+" next to the Feather icon or use gems to buy more Feather Stamina. More information can be found here.
Stamina to play. You're able to convert your Stamina into Feather Stamina by clicking on the "+" next to the Feather icon or use gems to buy more Feather Stamina. More information can be found here.
Each day you have 80x free Blitz Time to quick clear stages. Afterwards, you have to use gems to buy more Blitz Time. Otherwise, you have to complete your stages manually by clicking the "Challenge Now" button. Doing stages manually will reward you with 60x Dharma EXP while using 1 Blitz Time only gives you 50x Dharma EXP.
Aside from Dharma EXP, you can also claim 50x Occult Points and 1x Occullith Shard for each completed stage. Some stages also drop Materials, which are used for the Dharma Tier Up feature. Occult Trial Stages have a higher chance to drop Tier Up Materials than Main Story Stages.
Stage List
Karma Mechanics
Karma Shoot Strength is combined from the 4 karma attributes: Decision, Creativity, Affinity & Execution. Shoot Strength will be converted into the Occult Attributes: HP (Health Points/Hit Points) and SD (Spell Damage). SP/SSR Karmas possess the strongest Occult Attributes when they are upgraded in Westmoon Kingdom.
Westmoon has its own karma upgrade system called the "Dharma System". It’s divided into "Level" and "Tier Up". To raise the karma attributes, you need a fixed amount of Dharma EXP. In total, each tier has 5 levels.
After reaching the last level of each tier, you’ll have the option to tier up your karma, which will require Occullith Shards and Dharma tier up materials. Tiering up not only increases your karma's attributes, but it also unlocks karma skills that are very useful in battle. The "Cooldown Time" of skills describes the dormancy time in between skill activations. Therefore, a long cooldown time means it takes longer for the skill to be activated again after use.
Karma Skills
Normal Skill already unlocked from the beginning.
| Character | Skill Name | Description |
|---|---|---|
| Kiro | Choke | Physical Damage to single enemy |
| Kiro | Choke - Crowd | Physical Damage to all enemies |
| Kiro | Choke - Front Row | Physical Damage to front row enemies |
| Gavin | Wind Guest | Physical Damage to single enemy |
| Gavin | Wind Guest - Crowd | Physical Damage to all enemies |
| Gavin | Wind Guest - Front Row | Physical Damage to front row enemies |
| Lucien | Firefly Strike | Spell Damage to single enemy |
| Lucien | Firefly Strike - Crowd | Spell Damage to all enemies |
| Lucien | Firefly Strike - Front Row | Spell Damage to front row enemies |
| Victor | Time Blade | Spell Damage to single enemy |
| Victor | Time Blade - Crowd | Spell Damage to all enemies |
| Victor | Time Blade - Front Row | Spell Damage to front row enemies |
| Shaw | Blink | Spell Damage to single enemy |
Active Skill unlocks at Dharma Tier 1.
| Character | Skill Description | Cooldown Time |
|---|---|---|
| Kiro | After casting skill, for the next 6 seconds each loss of HP raises his Dodge | Medium |
| Kiro | After casting skill, for the next 6 seconds he will recover HP with each skill cast | Long |
| Kiro | Bless allied Karma with strongest Occult, boosting Occult 150% | Long |
| Kiro | Dealing with equal damage to 15% of target’s Max HP | Long |
| Kiro | Heal ally with highest Max HP and raise ally’s Dodge for 6 seconds | Medium |
| Kiro | Physical Damage to enemy with lowest HP and put target into "Soul Shackle" | Long |
| Kiro | Put all enemies into "Soul Shackles" for 3 seconds | Medium |
| Kiro | Silence all enemies for 8 seconds | Short |
| Kiro | When using Occult against back row enemy, HP Damage towards enemy with lowest HP | Short |
| Kiro | When using Occult against front row enemy, HP Damage towards enemy with lowest HP | Short |
| Gavin | Bless allied Karma with lowest HP by boosting his Defense 50% | Long |
| Gavin | Damage to back row enemy, extra HP Damage to enemies with HP above 50% | Long |
| Gavin | Deal damage to enemy with highest Defense and lower target’s Defense 10% for 6 seconds | Short |
| Gavin | Heal front row allies and give extra HP for each attack received in the next 6 seconds | Short |
| Gavin | HP Damage to enemy with lowest HP, extra damage when target’s HP is below 50% | Long |
| Gavin | Lower Occult of all enemies for 6 seconds | Long |
| Gavin | Lower Physical Defense of all enemies for 6 seconds | Medium |
| Gavin | Lower Spell Defense for all enemies 40% for 6 seconds | Medium |
| Gavin | Raise own Occult and Critical Rate 50% for 6 seconds | Long |
| Gavin | Remove own weaking effects and continuously receive healing | Medium |
| Lucien | Attack enemy and remove enhancing effects from target | Short |
| Lucien | Cast Occult, continuous HP Damage to all enemies | Long |
| Lucien | For 6 seconds each time HP Damage is received all subsequent HP Damage will be lowered, this effect can stack | Short |
| Lucien | Heal all allies and give extra healing to an ally with lowest HP | Medium |
| Lucien | Heal front row allies while raising Dodge for healing units | Long |
| Lucien | HP Damage to single enemy, make him lose continuously HP for next 6 seconds | Medium |
| Lucien | HP Damage to single enemy, silence every attack received for next 4 seconds | Long |
| Lucien | Remove weakening effects from all allies and continuously restore HP | Medium |
| Lucien | Small amount of HP Damage to all enemies and silence them | Short |
| Victor | Attack all enemies with Occult Power with the chance to put them into "Soul Shackle" state | Long |
| Victor | Cast Curse on “demon” type enemy, increasing their received HP Damage | Short |
| Victor | Cast Spell to single front row enemy, target will deal with HP Damage each time his own Occult is used | Short |
| Victor | Focused Strike, HP Damage to all front row enemies, extra damage to “demon” type enemies | Long |
| Victor | For the next 6 seconds each time you lose HP, you will get a certain amount of healing | Medium |
| Victor | Give self-continuous healing effect for 6 seconds. Each time healed, Dodge stat is raised | Short |
| Victor | Heal all allies and continuously receive healing for 6 seconds | Medium |
| Victor | HP Damage to enemy with highest Occult, lower the target’s hit rate | Long |
| Victor | Raise Critical Rate for all allies 70% for 6 seconds | Medium |
| Victor | Summon "demon realm miasma", dealing 5 hits of damage to single enemy, continuously lowering HP at 0.5 seconds intervals | Long |
| Shaw | Damage to back row enemy, lower his attack by 5% | Long |
| Shaw | HP Damage to all enemies and lower Defense by every attack received for the next 6 seconds | Long |
| Shaw | HP Damage to front row enemy | Long |
Passive Skill unlocks at Dharma Tier 5.
| Skill Name | Description |
|---|---|
| Bestowal | Raise Occult 10% |
| Crescendo | When battle starts, Critical Rate increases every 4 seconds by 5% |
| Don Armor | Raise Physical DEF 15% |
| Imminent Threat | When HP is below 50%, Occult is raised 15% |
| Linked Limbs | Attacking the enemy, there’s a 10% chance of recovering 10% of Max HP |
| Ninth Conversion | After being attacked, there’s a 10% chance of recovering 10% of Max HP |
| Spring Vitality | Lower damage received 10% |
| Spry | Raise Dodge 10% |
| Sublimate | Raise Spell DEF 15% |
| Unhurried | When HP is above 50%, Occult raised 15% |
| Unrestrained | Raise Critical Rate 15% |
Character Skill unlocks at Dharma Tier 3.
| Character | Skill Name | Description |
|---|---|---|
| Kiro | Morale Theft | After hitting enemy with Critical Strike, target’s Occult lowered 15% for 6 seconds |
| Gavin | Synergy | When persistent boost is received from an ally, his Occult is raised by an extra 10% |
| Lucien | Dreamlike Existence | When attacked, there’s a 15% chance of instantly counterattacking, dealing an equal amount of Spell Damage to attacker |
| Victor | Reversal | When hit with fatal damage, 5% chance of being immune and restoring HP back to 50% |
| Shaw | Chain Lighting | After attacking, there’s a 20% chance of setting off a chain reaction, which will attack all enemies in the same row |
Dharma Tier Up
Here are the required materials listed for Dharma Tier Up. An Overview of Dharma Tier Up Materials can be found here.
| Dharma Tier | Amount of Occullith Shard | Required Materials |
|---|---|---|
| 1 |
| |
| 2 |
| |
| 3 |
| |
| 4 |
| |
| 5 |
| |
| 6 |
| |
| 7 |
| |
| 8 |
| |
| 9 |
|
| Dharma Tier | Amount of Occullith Shard | Required Materials |
|---|---|---|
| 1 |
| |
| 2 |
| |
| 3 |
| |
| 4 |
| |
| 5 |
| |
| 6 |
| |
| 7 |
| |
| 8 |
| |
| 9 |
|
| Dharma Tier | Amount of Occullith Shard | Required Materials |
|---|---|---|
| 1 |
| |
| 2 |
| |
| 3 |
| |
| 4 |
| |
| 5 |
| |
| 6 |
| |
| 7 |
| |
| 8 |
| |
| 9 |
|
Battle Mechanics
For the battle you have to choose 5 karmas which will be used to fight against enemies. Karmas are categorized into 3 roles: Front Row Guard, Attack and Support. It would be wise to have Front Row Guard karmas in the front row while filling the back row with Attack and/or Support karmas. Below are a couple recommendations for battle lineups:
- 2x Front Row Guard (front), 2x Attack and 1x Support (back)
- 2x Front Row Guard (front) and 3x Attack (back)
Attack karmas have strong offensive capabilities/strong Attack stats. They should be placed in the back row. On the other hand, Front Row Guard karmas possess high HP stats and should be placed in the front row. Having a proper battle lineup composition is the key to pass stages, especially the Occult Trial ones. Battles have a maximum duration of 60 seconds, and it will count as a failed battle if the time runs out.
Bond Skills
You must equip 3 Bond Skills before each battle, and it's important to note that each Bond Skill has different strengths and qualities. Bond Skills are used to help you defeat the enemies, and their effects will be more powerful if 3 icons of the same Bond Skill are allowed to stack up before casting. Of the available 5 Bond Skills, the colored ones have a chance triggering a "Pull of Destiny" when fully stacked. A Pull of Destiny will further enhance the Bond Skill's effect.
To cast a Bond Skill, you must tap on the icon at the bottom of your screen during battles. If you select a Bond Skill that matches with the karma of the character that you've chosen in your battle lineup, then you will receive an extra % boost of Spell Damage or Physical Damage. As an example, you'll get an extra % boost if you cast Victor's Bond Skill, "Raging Wave", while having at least one of his karmas in your battle lineup.
Ray of Hope
Ray of Hope is one of the Westmoon Kingdom Event's main event currencies. By completing the "Daily Duty" and "Patient Practice" tasks, you will be rewarded with Ray of Hope points which can be used to advance through "Phases".
The Westmoon Event is divided into 4 Phases, and you must accumulate a fixed amount of Ray of Hopes to advance to the next Phase.
| Phase | Ray of Hope |
|---|---|
| Rising | 0-1400 |
| Spreading | 1400-3200 |
| Turning | 3200-5400 |
| Falling | 5400-8000 |
When reaching the end of each Phase with 1400/3200/5400/8000 Ray of Hopes, you'll get the chance to draw one random Westmoon SSR in the Lantern Wish page. You can only draw a total of 4 times, and there won't be any duplicate draws.
Tasks
Daily Duty tasks reset each day at 5:00 server time while Patient Practice tasks are long term achievements which can only be completed a fixed number of times. Certain Patient Practice tasks will only be available after the corresponding Phase has been unlocked. When a new Phase is unlocked, incomplete tasks from a previous Phase can be still completed.
For completing 8 tasks from Daily Duty, you can claim each day:
 Dharma EXP x500
 Gem x10
 Desire Notes x1
| Task Description | Amount of Ray of Hope (per Task) |
Daily Task Limit | Total Amount of Ray of Hope Gained |
|---|---|---|---|
| Enter Westmoon | 5 | 1 | 5 |
| Win 30x in WM Main Story or Occult Trial | 5 | 1 | 5 |
| Raise Karma's Dharma Level 1x | 6 | 1 | 6 |
| Do Stamina conversion 1x | 3 | 5 | 15 |
| Buy Feather Stamina 1x | 2 | 15 | 30 |
| Spend 100 pts of Feather Stamina | 5 | 20 | 100 |
| Task Description | Amount of Ray of Hope Gained | Required Phase |
|---|---|---|
| Draw from Westmoon Wish Tree 10x | 200 | Rising |
| Draw from Westmoon Wish Tree 20x | 200 | Spreading |
| Draw from Westmoon Wish Tree 30x | 200 | Spreading |
| Draw from Westmoon Wish Tree 40x | 200 | Spreading |
| Draw from Westmoon Wish Tree 50x | 200 | Turning |
| Draw from Westmoon Wish Tree 60x | 200 | Turning |
| Draw from Westmoon Wish Tree 70x | 200 | Turning |
| Draw from Westmoon Wish Tree 80x | 200 | Turning |
| Draw from Westmoon Wish Tree 100x | 360 | Turning |
| Draw from Westmoon Wish Tree 120x | 360 | Turning |
| Draw from Westmoon Wish Tree 140x | 360 | Turning |
| Draw from Westmoon Wish Tree 160x | 360 | Turning |
| Draw from Westmoon Wish Tree 180x | 360 | Turning |
| Draw from Westmoon Wish Tree 200x | 360 | Turning |
| Draw from Westmoon Wish Tree 250x | 800 | Turning |
| Draw from Westmoon Wish Tree 300x | 800 | Turning |
| Draw from Westmoon Wish Tree 350x | 800 | Turning |
| Draw from Westmoon Wish Tree 400x | 800 | Turning |
| Win 5k times in Westmoon Main Story or Occult Trial Stages | 20 | Rising |
| Win 10k times in Westmoon Main Story or Occult Trial Stages | 40 | Spreading |
| Win 12k times in Westmoon Main Story or Occult Trial Stages | 45 | Turning |
| Win 14k times in Westmoon Main Story or Occult Trial Stages | 50 | Turning |
| Win 16k times in Westmoon Main Story or Occult Trial Stages | 55 | Turning |
| Win 18k times in Westmoon Main Story or Occult Trial Stages | 60 | Falling |
| Win 20k times in Westmoon Main Story or Occult Trial Stages | 75 | Falling |
| Get 50k of Dharma EXP | 10 | Rising |
| Get 150k of Dharma EXP | 15 | Rising |
| Get 250k of Dharma EXP | 20 | Spreading |
| Get 350k of Dharma EXP | 25 | Spreading |
| Get 450k of Dharma EXP | 30 | Spreading |
| Get 550k of Dharma EXP | 35 | Turning |
| Get 650k of Dharma EXP | 40 | Turning |
| Get 750k of Dharma EXP | 45 | Turning |
| Get 850k of Dharma EXP | 50 | Falling |
| Get 950k of Dharma EXP | 60 | Falling |
| Spend 10k pts of Feather Stamina | 15 | Rising |
| Spend 20k pts of Feather Stamina | 20 | Rising |
| Spend 30k pts of Feather Stamina | 30 | Spreading |
| Spend 40k pts of Feather Stamina | 40 | Spreading |
| Upgrade a total of 10 Karma to Tier 1 Lv.5 | 10 | Rising |
| Upgrade a total of 10 Karma to Tier 2 Lv.5 | 10 | Rising |
| Upgrade a total of 10 Karma to Tier 3 Lv.5 | 15 | Rising |
| Upgrade a total of 10 Karma to Tier 4 Lv.5 | 20 | Rising |
| Upgrade a total of 10 Karma to Tier 5 Lv.5 | 25 | Rising |
| Upgrade a total of 10 Karma to Tier 6 Lv.5 | 35 | Spreading |
| Upgrade a total of 10 Karma to Tier 7 Lv.5 | 40 | Spreading |
| Upgrade a total of 10 Karma to Tier 8 Lv.5 | 45 | Turning |
| Upgrade a total of 10 Karma to Tier 9 Lv.5 | 80 | Turning |
| Upgrade a total of 20 Karma to Tier 9 Lv.5 | 120 | Falling |
| Own a total of 5 Tier 1 Karma | 5 | Rising |
| Own a total of 5 Tier 2 Karma | 5 | Rising |
| Own a total of 5 Tier 3 Karma | 10 | Rising |
| Own a total of 5 Tier 4 Karma | 15 | Rising |
| Own a total of 5 Tier 5 Karma | 20 | Rising |
| Own a total of 5 Tier 6 Karma | 25 | Spreading |
| Own a total of 5 Tier 7 Karma | 30 | Spreading |
| Own a total of 5 Tier 8 Karma | 35 | Spreading |
| Own a total of 5 Tier 9 Karma | 50 | Turning |
| Own a total of 15 Tier 9 Karma | 100 | Falling |
| Enter Westmoon a total of 10 days | 10 | Rising |
| Enter Westmoon a total of 20 days | 10 | Rising |
| Enter Westmoon a total of 30 days | 10 | Rising |
| Enter Westmoon a total of 40 days | 10 | Rising |
| Enter Westmoon a total of 50 days | 15 | Rising |
| Enter Westmoon a total of 60 days | 15 | Spreading |
| Enter Westmoon a total of 70 days | 15 | Spreading |
| Enter Westmoon a total of 80 days | 15 | Spreading |
| Enter Westmoon a total of 90 days | 15 | Spreading |
| Clear Main Story Ch. 1 | 10 | Rising |
| Clear Main Story Ch. 2 | 10 | Rising |
| Clear Main Story Ch. 3 | 10 | Rising |
| Reach Royal Occultist rank Occultist - Novitiate | 10 | Rising |
| Reach Royal Occultist rank Occultist - Acolyte | 15 | Rising |
| Reach Royal Occultist rank Occultist - Exemplar | 20 | Rising |
| Reach Royal Occultist rank Occultist - Nonpareil | 25 | Rising |
| Clear 1 LI's Destiny of Desire | 10 | Spreading |
| Clear 2 LI's Destiny of Desire | 10 | Spreading |
| Clear 3 LI's Destiny of Desire | 10 | Spreading |
| Clear 4 LI's Destiny of Desire | 10 | Spreading |
| Clear Occult Trial Ch. 1 | 10 | Spreading |
| Clear Occult Trial Ch. 2 | 10 | Spreading |
| Clear Occult Trial Ch. 3 | 10 | Spreading |
Lantern Wish
Lantern Wish is the place where you can collect Ray of Hope points from tasks. You can also view the total amount of points you currently have. For reaching certain Ray of Hope nodes, you will be able to claim lantern rewards. Each Phase has in total 15 rewards.
Lantern Rewards
| Rays of Hope | Rewards |
|---|---|
| 90 | |
| 180 | |
| 270 | |
| 360 | |
| 450 | |
| 540 | |
| 630 | |
| 720 | |
| 810 | |
| 900 | |
| 990 | |
| 1080 | |
| 1185 | |
| 1290 | |
| 1400 |
|
| Rays of Hope | Rewards |
|---|---|
| 1520 | |
| 1640 | |
| 1760 | |
| 1880 | |
| 2000 | |
| 2120 | |
| 2240 | |
| 2360 | |
| 2480 | |
| 2600 | |
| 2720 | |
| 2840 | |
| 2960 | |
| 3080 | |
| 3200 |
|
| Rays of Hope | Rewards |
|---|---|
| 3345 | |
| 3490 | |
| 3635 | |
| 3780 | |
| 3925 | |
| 4070 | |
| 4215 | |
| 4360 | |
| 4505 | |
| 4650 | |
| 4795 | |
| 4940 | |
| 5090 | |
| 5240 | |
| 5400 |
|
| Rays of Hope | Rewards |
|---|---|
| 5570 | |
| 5740 | |
| 5910 | |
| 6080 | |
| 6250 | |
| 6420 | |
| 6590 | |
| 6760 | |
| 6930 | |
| 7100 | |
| 7270 | |
| 7440 | |
| 7625 | |
| 7810 | |
| 8000 |
One random drop of these Westmoon SSRs, no duplicate! |
Royal Occultist Rank
Your inital rank is the Occultist Idler. The rank can be raised though collecting ![]() Occult Points and fulfilling the requirements listed below.
Occult Points and fulfilling the requirements listed below.
| Rank | Requirements | Rewards | Gained Title |
|---|---|---|---|
| 1. Novitiate |
|
|
|
| 2. Acolyte |
|
|
|
| 3. Exemplar |
|
|
|
| 4. Nonpareil |
|
|
Westmoon Wish Tree
The Westmoon Wish Tree, also called Three Dreams Wish Tree, drops Westmoon-exclusive items such as Feather Stamina and Blitz Time. Karmas from the Wish Tree are also included in the drops. The Westmoon Wish Tree does not include Time-Limited karmas from any Wish Tree Event that runs while the Westmoon Kingdom Event is live.
Destiny of Desire
The Destiny of Desire feature unlocks after completing Westmoon Chapter 2-1. It's similar to Dates. Each Destiny of Desire has five parts which can be unlocked by using Desire Notes. For completing the parts you can claim rewards.
| Part | Desire Notes Cost | Rewards |
|---|---|---|
| Chapter I | - | |
| Chapter II | ||
| Chapter III | ||
| Chapter IV | ||
| Chapter V | ||
| Total |
While yet young, let your days and years be filled with wandering and song. The swing wobbles, wheat fields undulate, though laughter no longer lingers on. Hearts resonate with one another, like echoes of a childhood rhyme bygone.
Even though the world is topsy-turvy, both high and low you roam at will. A boy's will: Ride wind faster than any horse, set out for the horizon, and live out life with a sword at your side.
The long dream ends, fireflies disperse, and the flowers fall. Seasons turn to a faraway time, dreaming back to boyhood years. Night creeps in, sounds grow, and a solitary figure stands in the window.
The storyteller is prattling on as listeners come and go. Fiction and reality, truth and illusion intermingle in a merciless world of turmoil. Life is like a journey through the night.
Dark Moon Market
In the Dark Moon Market you can exchange for Tier Up materials.
| Needed Items | To Exchange For |
|---|---|
|
|
|
|
|
|
|
|
|
|
|
|
|
|
|
|
|
|
|
|
|
|
|
|
|
|
|
|
|
|
|
|
Occultist Shop
These packs can also be bought from Evol Supply.
| Icon | Name | Content | Cost (USD) | Purchase Limit |
|---|---|---|---|---|
 |
Feather Stamina Pack Plus |
|
$0.99 | Once (Time-Limited for 24H) |
 |
Feather Stamina Pack Plus |
|
$1.99 | Once (Time-Limited for 24H) |
 |
$ 0.99 Pack |
|
$0.99 | Once |
 |
Daylight Star Pack |
|
$4.99 | Once |
 |
Dreams of Stars Pack |
|
$9.99 | Once |
 |
Spring Song Pack |
|
$29.99 | Once |
 |
Mirror Labyrinth Pack |
|
$49.99 | Once |
 |
Lovesickness Pack |
|
$0.99 | Once a day |
 |
Heartsickness Pack |
|
$0.99 | Once a day (VIP Player) |
 |
Outstretched Wings Pack |
|
$4.99 | Once a day |
 |
Picturesque Life Pack |
|
$9.99 | 3 times a day |
 |
Special Heavy Heart Pack |
|
$1.99 | Once |
 |
Heavy Heart Pack |
|
$4.99 | N/A |

